

This particular bundle monster stamp was the one that really drew me to the set. I’m not sure why I haven’t used it until now!
I used a black base and stamped in Sally Hanson Silver Sweep. I could have left it at that, and I think I liked that look better actually. But, I went in with a small dotting tool and added in the shimmery green dots.
I rushed it a bit, so my apologies for the smudges!
I originally titled this post My Top 5 Nail Art Designs, but I got a little carried away. Its was really fun to look back through my posts! Here are my top 10 favorites, they aren’t always the ones with the most views, but they are my personal favorites.
This was my first year doing nail art. And this flowery design was one of the first that I thought came out looking really nice and clean. It was also when I discovered OPI San Tan Tonio, which I just adore.
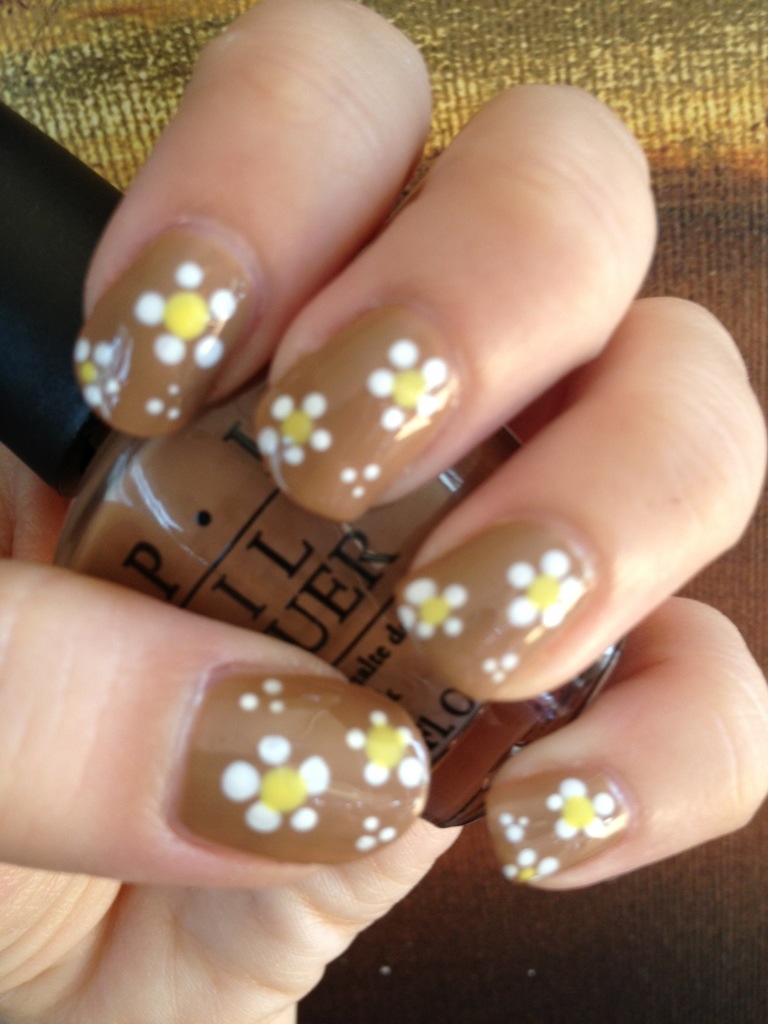

This is one of my favorite color combinations and the simplicity and ease of this design makes it a winner for me!


I just love these flowers! This is an all over design, but I have used the same technique throughout the year as an accent nail and in different color combinations. This one is so much easier that it looks and gives you a lot of bang for your buck!


Polka dot Gradient. I just love how this one turned out. It was so fun to wear and got a lot of attention.


I’m much more of a halloween girl, but I did love wearing this super festive desing. The gold glitter is China Glaze, Bombshell. It’s a must have, excellent coverage.


I really liked the simplicity of this flowery french design.


Halloween is just soooo fun and this is the design that I wore for all my little trick or treaters.


I had to choose one more halloween mani, because these were relaly my favorite of all the holiday designs I did throughout the year.


Bows! I had been trying and failing forever to get this bow design just right!


Owls, who doesn’t love owls. I had to try out my own version.


I have to say a big thank you to everyone that has followed my blog and those that have given me inspiration. Happy 2013!

This one is super simple! I started off with a sparkly red polish. This one is Sally Hanson Xtreme Wear in Red Carpet. But, any red will do. Then I used a white polish to to do the wavy tips. I added some snow with a white polish and a dotting tool. Make sure you put lots of top coat on and wrap the white over the tips, the red will start to peek through quickly of you’re not careful. Perfect mani for today because I’m going to see Elf!


The base for this Mani is China Glaze Frosty. My all time favorite polish. The red and green are color club and I’m not sure of the names.
I used a large and small dotting tool. This one takes some patience and a steady hand, but it sure is festive!

This beauty came about by accident. And I really like it. I had some tip wear on a plain peach colored mani. I sponged some shimmery orange over most of the nail, and a shimmery pink closer to the tips. After living with that for a bit, I added the stamp. This is a bundle monster plate. And voila!


These nails proved to be impossible to photograph!!! Too sparkly I guess!! Well, luckily, in real life, there’s no such thing!!
I started off with China Glaze Frosty. This is far and away one of my all time favorite polishes. It is discontinued, but available on amazon.
I used scotch tape and a sparkly green polish for the tree. While the tape was still on, I dabbed on glitter for the lights. I used a dotting tool and a gold and yellow polish for the star. They are cute. But, I think I’d mix it up and not put trees on all the nails.


I’m sure that this is my first of many Christmas manicures for this holiday season. I’m also pretty sure that this is the design that I will wear on the big day, because I LOVE it!!
I stamped the pinky with a bundle monster plate. I used a paint brush to do the tree, but you could use a tooth pick pretty easily.
The rest is all just done with dotting tools. I hope you all like it!!


Well, as much as I hate to admit it, it’s winter. At least it is where I live!
Base coat for this design is So Happy by Sinful Colors. I stamped with Sally Hanson Silver Sweep using a snowflake stamp from the Shany set.
I then used a small piece of a make up sponge to add some glitter around the flakes. I used Sally Hanson Xtreme Wear Disco Ball. This is such a pretty glitter. It has no real color, but it’s a super pretty iridescent glitter that is really reflective in the light.
I then used a tiny dotting tool to add in some white dots for some more snow.
Cheers!


This is only a first attempt. I rushed it a bit. I will definitely be doing this one again sometime soon!
I painted a base coat of white. Then I used a large dotting tool and dotted a line just above the base of the nail. Continue making lines with your dotting tool in darker shades until you reach the tip of the nail. Really easy, and being super accurate is not essential.


I started this one with OPI Steady as She Rose, which I don’t really remember buying and I don’t think I’ve worn.
This entire design was done with dotting tools. I did the flowers and then added in some leaves because I thought it needed something extra. What do you think!?


